
How to connect to domain after hosting?
Besides publishing your site to the Webflow staging subdomain (e.g., yoursite.webflow.io), you can also publish your site to any custom domain you own (e.g., yourdomain.com) once you add a site plan to your site.
Before you get started, make sure you:
- Add a site plan to your Webflow site
- Own the domain name you want to connect to your site or buy a domain from a provider of your choice
- Can update your DNS records with your domain registrar or DNS provider
- Reset your DNS settings if you’ve previously hosted your domain elsewhere. This helps minimize and even eliminate issues or conflicts that might require troubleshooting later
In this lesson, you’ll learn:
Important: DNS changes may take up to 48 hours to fully propagate in all geolocations as the DNS cache expires, although this typically occurs within a few hours.
How to add a custom domain
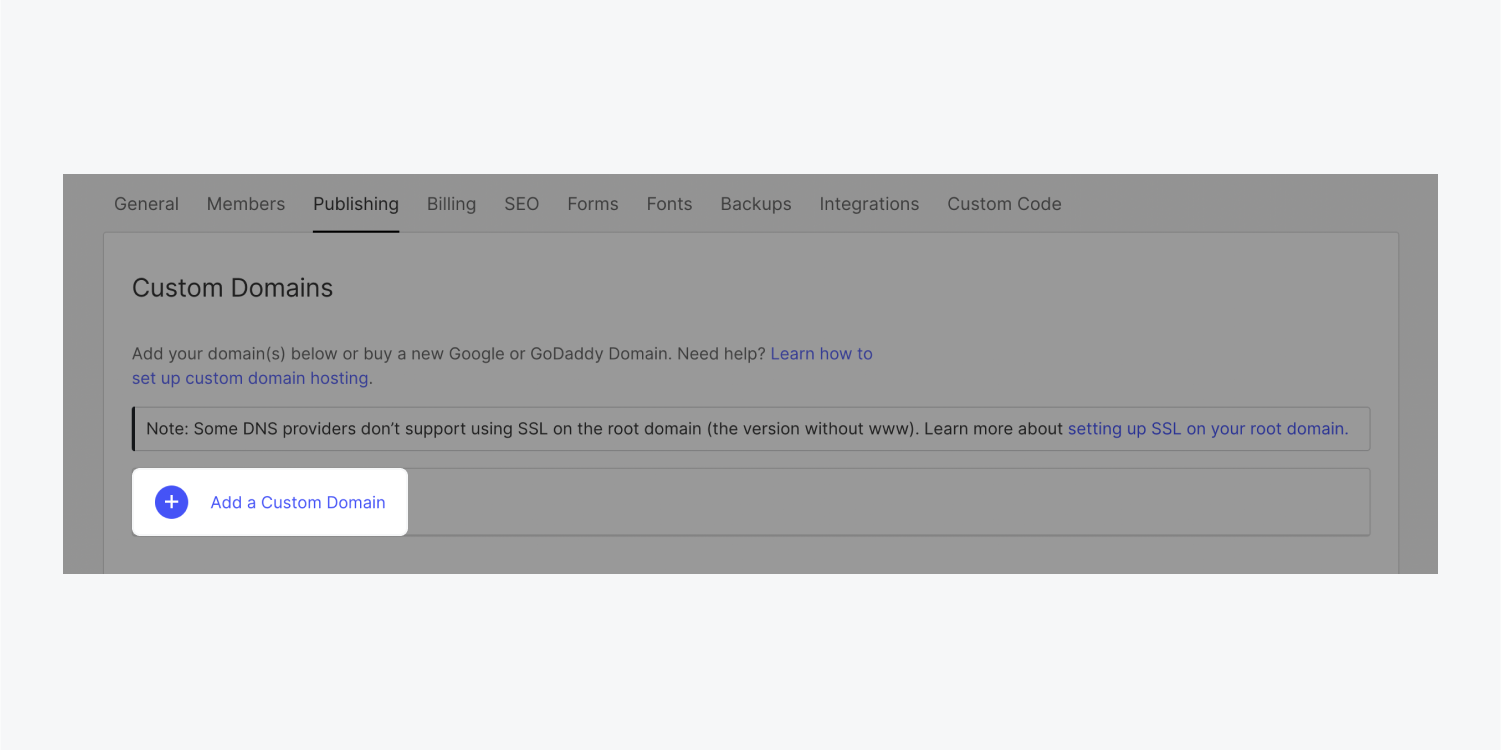
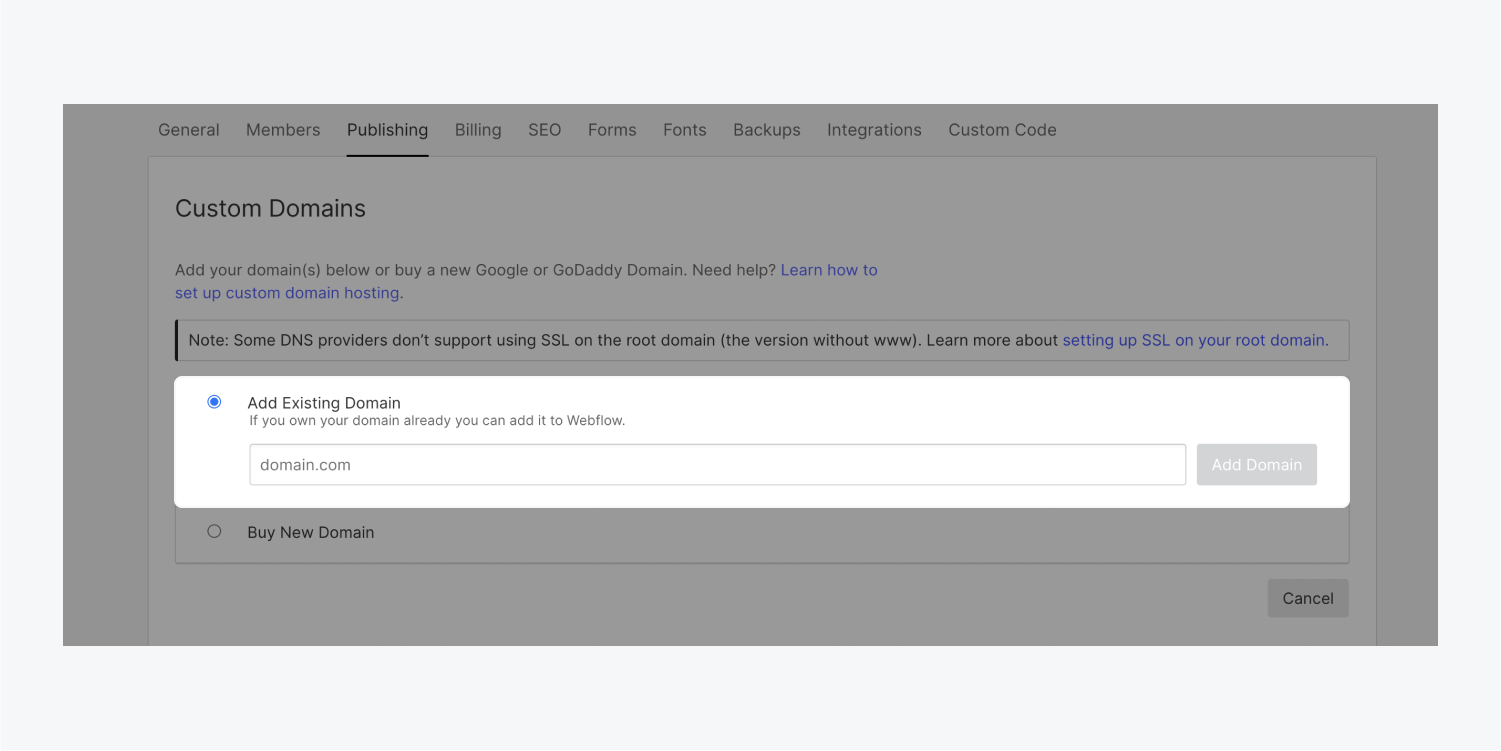
To add your custom domain(s) to your Webflow site:
- Open Site settings > Publishing tab > Custom domains
- Click Add a custom domain and enter your root domain (e.g., yourdomain.com) in the Add existing domain field – this will add both the root domain (e.g., yourdomain.com) and the www subdomain (e.g., www.yourdomain.com) to your site
Important:
check out our lesson on connecting a subdomain
Learn more about setting the root domain as the default domain on SSL hosting
Domains with special characters
Webflow supports Internationalized Domain Names (IDN) and domains with special characters (e.g., ä, ê, ó) in Punycode format. You can use a tool like Verisign to convert your domain to Punycode, though keep in mind that it doesn’t always work.
Note: Punycode format is only needed to add the custom domain with special characters to your site. A site visitor who types your domain with its special characters into their browser will still be able to visit your site.
How to update your DNS records
To update your DNS records, you’ll need to access your domain’s DNS settings in your domain registrar or DNS host’s dashboard.
Every DNS provider has their own process for updating DNS records. We recommend that you read the help documentation of your DNS provider, and contact their support for help with their interface and settings if needed. Check out this list of DNS providers and links to their documentation on updating DNS settings.
Note: The DNS records you’ll need to point your domain to your Webflow site differ depending on whether SSL is enabled or disabled on your site. Each time you enable or disable SSL on a Webflow-hosted site, you’ll need to update your DNS records. SSL is enabled by default on all Webflow sites created after November 14th, 2018. Learn more about enabling and disabling SSL.
DNS records for SSL hosting (recommended)
To point your custom domain to your Webflow site when SSL is enabled:
- Open the DNS settings for your custom domain (in your domain registrar or DNS host’s dashboard)
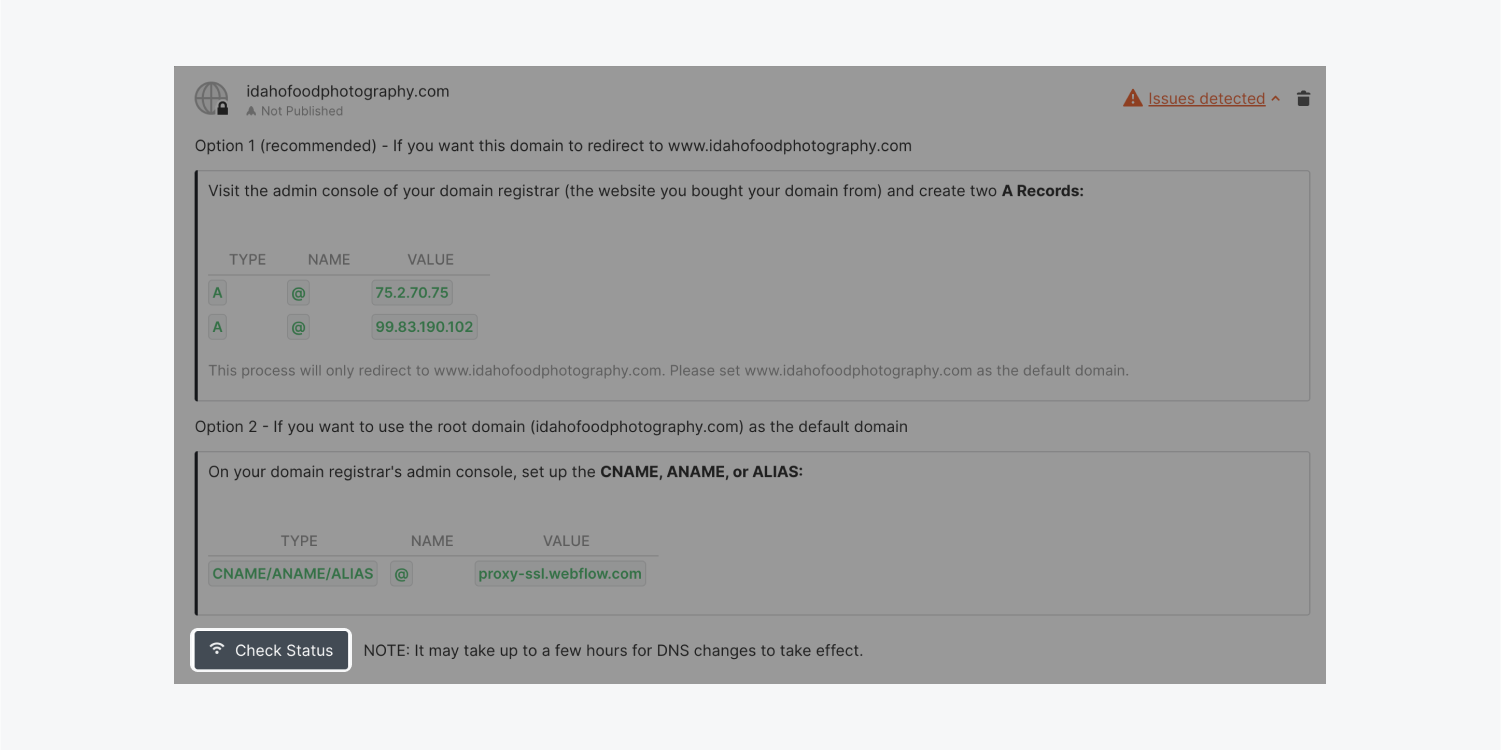
- Create an A record with the hostname @ and the value 75.2.70.75
- Create an A record with the hostname @ and the value 99.83.190.102
- Create a CNAME record with the hostname www and the value proxy-ssl.webflow.com
Note: Some DNS providers prefer that you set the root domain (e.g., yourdomain.com) as the hostname instead of @. Additionally, some DNS providers prefer that you set the www subdomain (e.g., www.yourdomain.com) as the hostname instead of www. We recommend that you check your DNS provider’s documentation. Check out this list of DNS providers and links to their documentation on updating DNS settings.
Important
Learn more about the Cloudflare integration
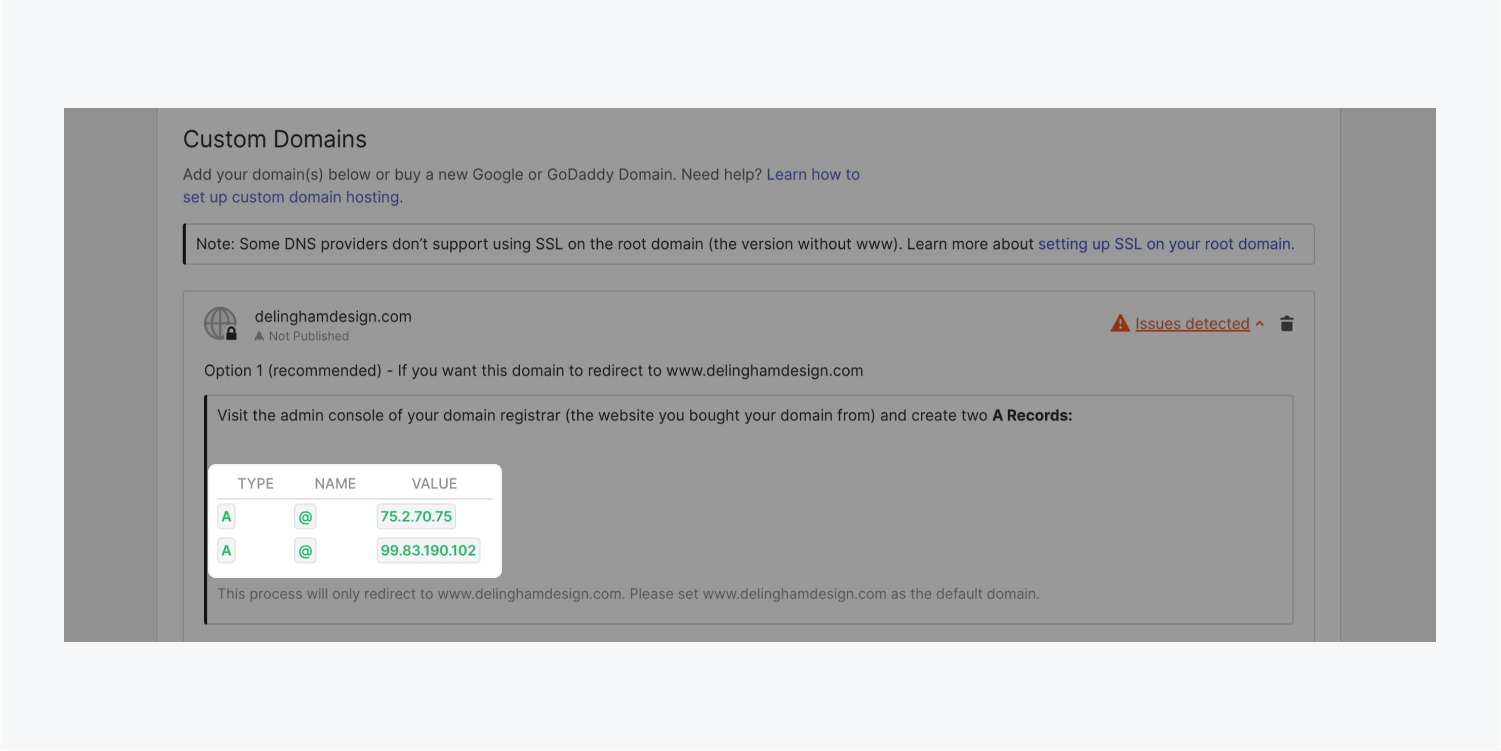
Pro tip: You can copy the necessary DNS records from Site settings > Publishing tab > Custom domains.
DNS records for non-SSL hosting (not recommended)
Important:
Learn more about enabling and disabling SSL
To point your custom domain to your Webflow site when SSL is disabled:
- Open the DNS settings for your custom domain (in your domain registrar or DNS host’s dashboard)
- Create an A record with the hostname @ and the value 23.235.33.229
- Create an A record with the hostname @ and the value 104.156.81.229
- Create a CNAME record with the hostname www and the value proxy.webflow.com
Note: Some DNS providers prefer that you set the root domain (e.g., yourdomain.com) as the hostname instead of @. Additionally, some DNS providers prefer that you set the www subdomain (e.g., www.yourdomain.com) as the hostname instead of www. We recommend that you check your DNS provider’s documentation. Check out this list of DNS providers and links to their documentation on updating DNS settings.
Important
Learn more about the Cloudflare integration
How to set the default domain
If you’ve connected more than one domain to your site, you’ll need to set a default domain to redirect all traffic from the other domains to the default. This helps to avoid SEO penalties due to duplicate content.
To set the default domain:
- Open Site settings > Publishing tab > Custom domains
- Hover over the domain you’d like to set as the default and click Make default
Important:
check out our lesson on connecting a subdomain
Learn more about setting the root domain as the default domain on SSL hosting

How to verify the domain is pointing to Webflow
To verify that your DNS settings are correct, and that your domain is correctly pointing to your Webflow site, click Check status under your domain name in Site settings > Publishing tab > Custom domains.
DNS changes can take up to 48 hours to fully propagate in all geolocations as the DNS cache expires, although this typically occurs within a few hours. If your site verification doesn’t work right away, you can come back later to check the status again.
If your DNS records are live and pointing to Webflow and you’re still experiencing issues with domain verification after 2 days, please contact Webflow’s customer support team.
How to publish your site to your custom domain
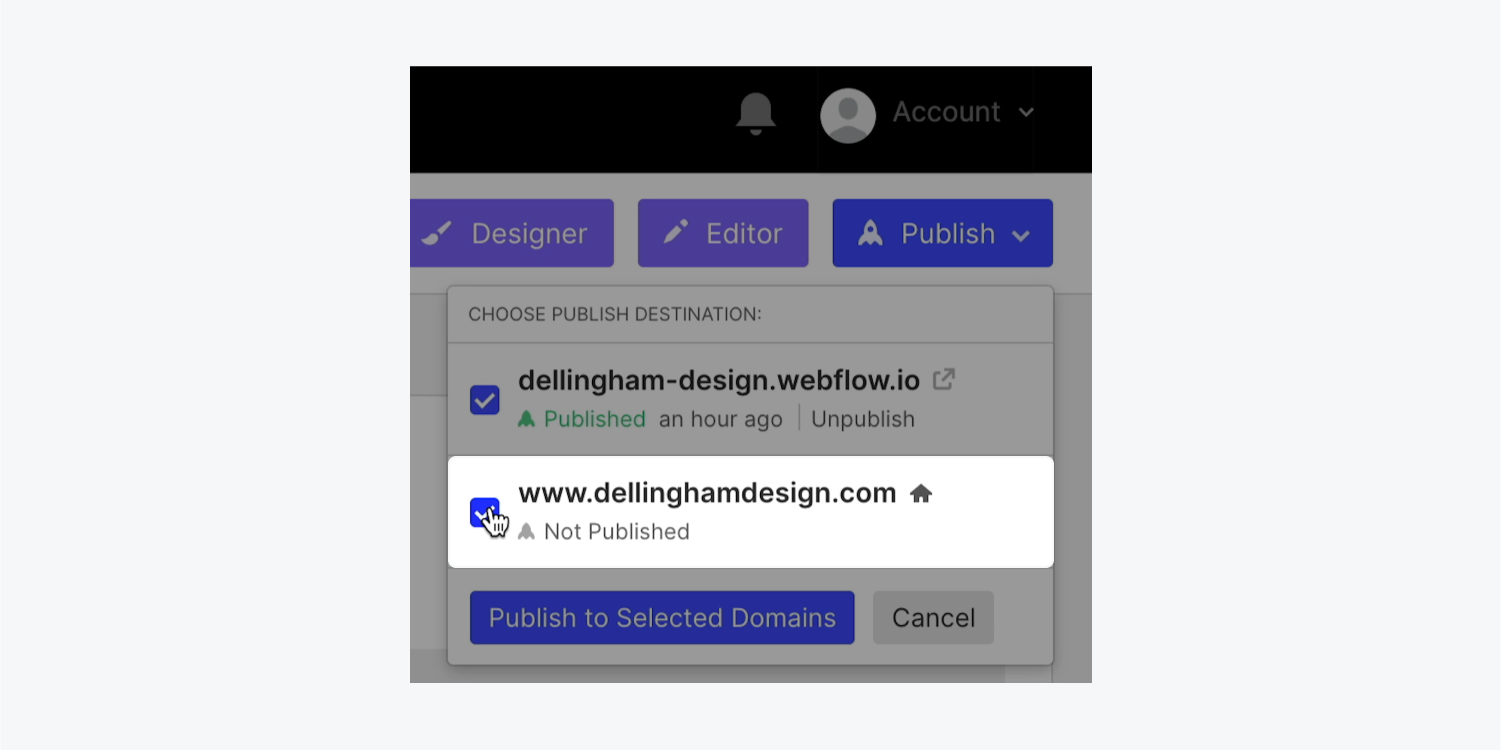
The final step to getting your site live on your custom domain is publishing the site. Once you’ve added your custom domain(s) to your site, you should see them in the publish menu. Make sure to select your custom domain(s) before publishing. Learn more about publishing your Webflow site.
Important:
Site settings
Publishing
Custom domains
Make default
FAQ and troubleshooting tips
I added my DNS records with my domain registrar but my site isn’t live yet. What’s going on?
While most DNS providers try to update your DNS records as fast as possible, many factors impact how long it takes for your site to appear on your custom domain, including TTL (time to live) and internet service providers. DNS changes can take up to 48 hours to fully propagate in all geolocations, although this typically occurs within a few hours, so it may be a matter of waiting a bit longer for the site to “come online.”
You can double-check that your DNS records are correct and view the propagation status using a tool like whatsmydns.
If your domain isn’t working correctly after 48 hours, please troubleshoot your DNS settings or contact your domain provider’s help desk. If your DNS settings are correct, but you’re still experiencing issues with your published site, please contact Webflow’s customer support team.
What should I do if my DNS provider doesn’t accept @ as the hostname?
Try entering the root domain (e.g., yourdomain.com) as the hostname instead of @. Some DNS providers prefer this method. We recommend that you check your DNS provider’s documentation. Check out this list of DNS providers and links to their documentation on updating DNS settings.
What should I do if my DNS provider only allows me to set one A record? Will my site still work if I only have one A record?
While your site should still work with just one A record, we strongly recommend using both A records to help with load balancing and redundancy – that way, if the primary server (one of the IPs) goes down, there will be a backup server to serve your site and avoid any downtime or outages.
If your DNS provider doesn’t allow you to add more than one A record, we recommend pointing your domain nameservers (NS records) to a third-party DNS provider like Cloudflare so you can manage your DNS records there. Learn more about the Cloudflare integration.
**Why is my new domain not showing up in the publishing menu?**If you add a new domain or subdomain after you’ve already set a default domain, the new domain or subdomain won’t appear within the publishing menu. To resolve this, open Site settings > Publishing tab > Custom domains and click the “Make default” button next to the domain previously set as the default. Then, publish your site to the new domain or subdomain, and set the default domain again.
**Why am I seeing a “too many redirects” error on my site?**Double-check that the default domain is set to the www subdomain (e.g., www.yourdomain.com). Setting the root domain as the default without adjusting your DNS settings can cause unexpected behavior, including redirect loops that cause the “too many redirects” error and prevent site visitors and site crawlers from reaching your site. Learn more about setting the root domain as the default domain on SSL hosting.
Can I connect more than one domain to my site?
You can add up to 50 custom domains to a site at a time. If you wish to use more than 50 domains, we recommend using a domain forwarding system.
Using multiple domains can also help redirect old domains to a new domain. To do this, connect all of the domains (old and new!) to your site, and set the new domain as the default. This ensures that all domains connected to your site are redirected to the new domain. Learn more about setting a default domain.
Why do I need to set a default domain?
Setting a default domain helps to avoid being penalized by Google for having duplicate content on the web. Additionally, not setting a default domain, or setting the root domain as the default, can cause unexpected behavior, such as loading issues in some geolocations and problems with site crawling due to excessive redirects.
Is my site published to all domains I connect to my site?
The site will be published to all connected domains and subdomains that are checked in the publish menu. If you’ve set a default domain, the site will be published to that domain, and all other domains will be redirected to that default URL.
Open the publish menu to manage which domains your site design is published to. You can uncheck any domains to avoid publishing to them.
**Can I publish different pages to different subdomains?**It’s not possible to publish specific pages to specific domains or subdomains. If you need to publish different pages to different subdomains, you’ll need to set up separate sites for each page. You’ll also need to add a separate site plan to each site and add the specific custom domain(s) or subdomain(s) to each site.
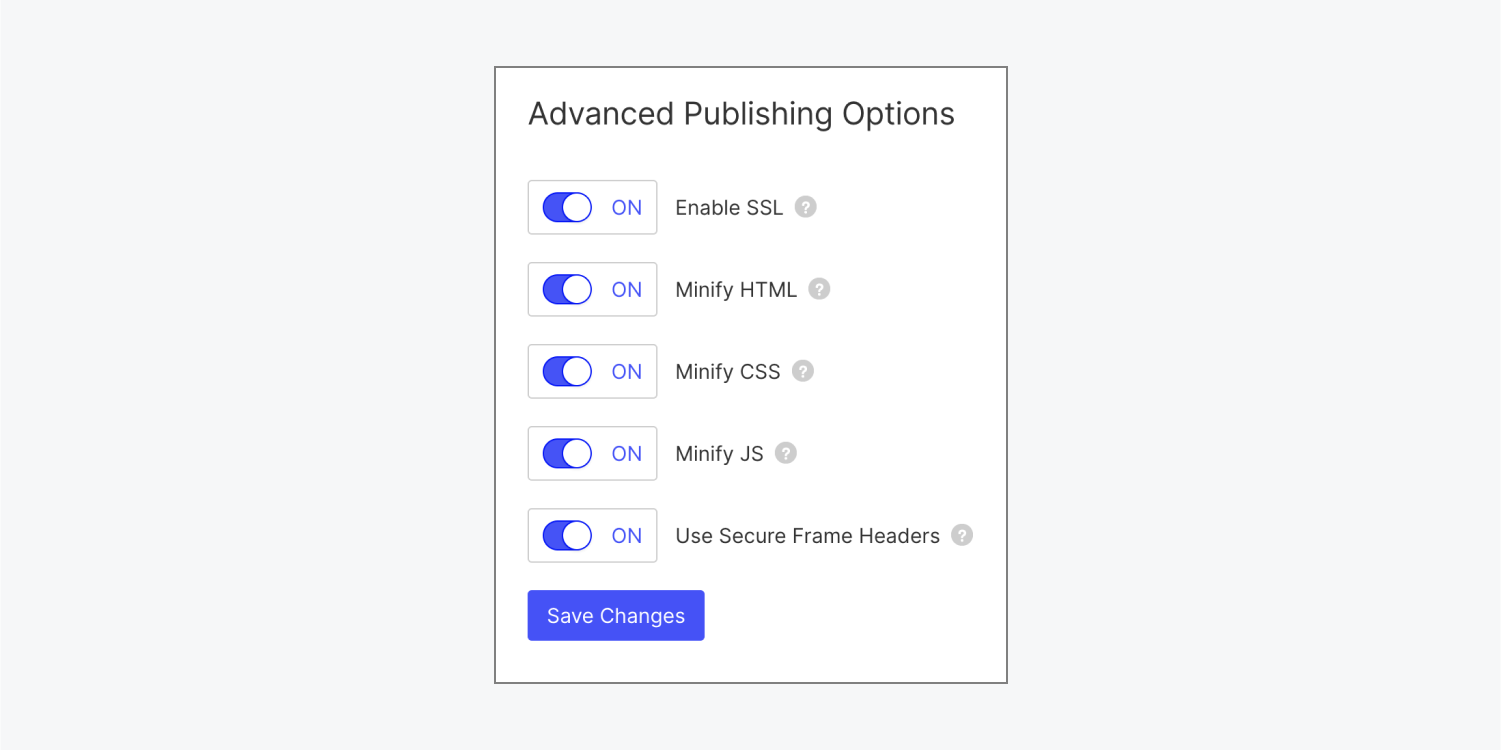
**Is SSL enabled for my site?**SSL is enabled by default for sites created after November 14th, 2018. If your site was created before that date, you can enable SSL by opening Site settings > Publishing tab > Advanced publishing options, toggling Enable SSL to “on,” and then clicking Save changes.
Important:
Learn more about DNS records for SSL and non-SSL hosting
**Can I turn SSL off?**You can switch SSL off, but we recommend against doing so. Sites that don’t use SSL may be labeled “not secure” by some browsers, strongly discouraging people from visiting your site. Learn more about enabling and disabling SSL.
For security, you cannot disable SSL on sites with Users enabled. Additionally, if you disable SSL on an Ecommerce site, the Add to cart button and Checkout functionality will no longer work.
Important:
Learn more about DNS records for SSL and non-SSL hosting